


The downswing is probably the most misunderstood and misinterpreted move by amateur golfers in the golf swing. It must be understood that the downswing is largely an uncoiling motion or a reaction to a proper backswing. The key point that must be illustrated is that the forces of movement in the downswing originate from the hips in a weight shift and pulling with the left oblique, NEVER from the upper body, shoulders, arms, etc.
The proper sequence of the downswing is as follows:
1. Plant the weight firmly by pushing the left heel into the ground.
2. Pull from the left oblique, which in turn will rotate the left hip behind you.
3. Pull with the left lat to pull the arms back in front of the torso.
4. Optional – fire the right arm by extending from the right elbow.
The result of this chain of events occurring in sequence and being performed from the proper origin is rotational force; the body moves away from the target and the arms and club moves towards the target. A separation between the hips and the upper torso in the downswing is maximized when the sequence of movements are performed correctly. Highest ball speeds are produced by those producing the maximal rotational separation between the upper torso and pelvis.
As we begin to examine Stricker’s downswing, it should be noted that Stricker finished 9th on the PGA Tour in proximity to the hole, and he hit over 2/3 of both fairways and greens this season. He has proven himself to be an excellent ball striker, as he does a fantastic job of getting that club on plane on the way down, which is a true testament to both his tremendous athletic ability and work ethic. Examining his swing from a purely anatomical and biomechanical perspective, however, we will see how the average golfer would likely struggle to recreate Stricker’s move without ample time to practice and improve the timing due to some of the inefficiencies that exist. The first image below is our Rotary Swing Model Chuck Quinton.
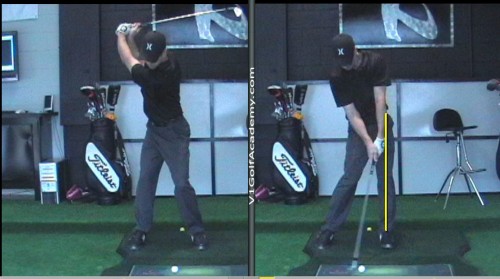
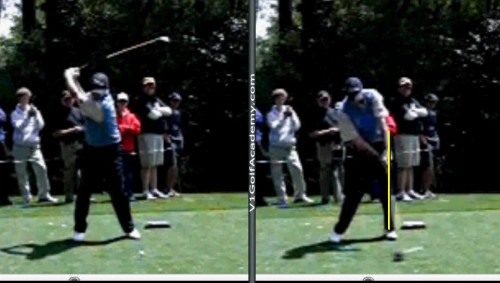
When comparing the face on view at impact for our model and Stricker, you can see from the yellow line that Stricker was unable to make a complete shift into his left side which leaves his left hip short of neutral joint alignment. This has occurred because Striker failed to roll his ankles in slightly at address, which allowed the weight to get trapped on the outside of his right foot during Move 2. A second cause is Stricker’s need to actively use his arms in his downswing because of his previously discussed push from the left side during Move 1 which allowed his arms to work too deep in his backswing.
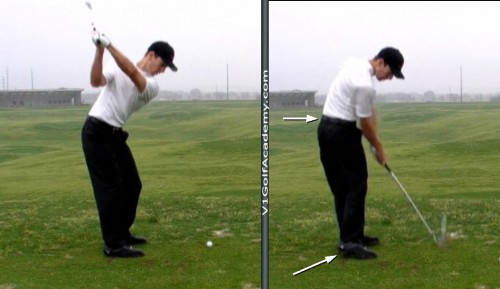
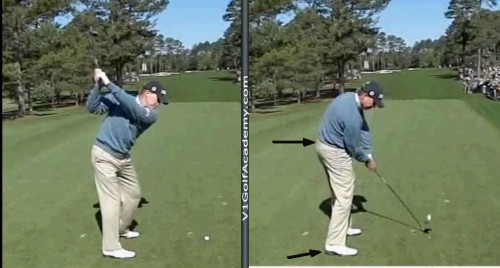
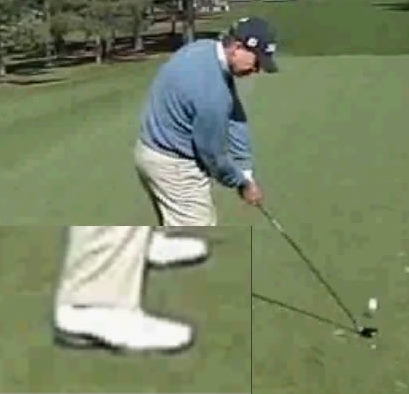
This series of photos from down the line illustrates how the lack of proper weight shift has affected Stricker’s hip rotation as compared to our model. The arrow pointing to the right heel shows how our model has efficiently transferred the majority of his weight into the left heel, and is pulling with that left oblique which allows for the right heel to passively rise off of the ground.
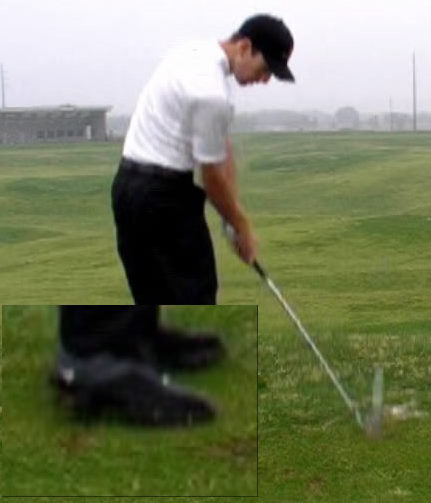
Stricker demonstrates a much flatter right foot at impact indicating there is still a significant amount of weight left on his right side.
This move can lead to a variety of results, most notably, the hands and arms outracing the body rotation which usually leads to pulls and hooks. In addition, maximum rotational separation between the upper torso and the pelvis cannot be achieved, resulting in a loss of power.


