by Chuck Quinton


![]()
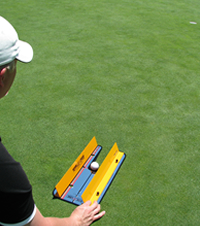
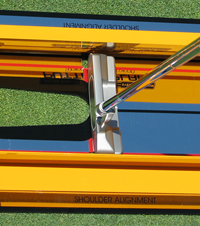
With the Putting Plane System you can easily use the mirrored surface to check that your eyes are over the ball, shoulders are lined up, and putter face is square. Its adjustable rails fit any putter size, and the whole system conveniently fits in your bag.
The inside rail is slanted at 72 degrees; this allows the putter to come slightly inside as it moves back and up during the stroke. Your shoulders and arms can move along the plane. This allows them to move around your spine as one piece. The putter face naturally opens and closes along the plane as a stroke is made.
As the putter glides along the 18 degree rail, feel the perfect Up & Inside stroke.
Feel, See, and Repeat the perfect stroke...You will have never rolled it so well.
 Step 1 - Precision Alignment to target line
The first step in using the Eyeline putting plane is to accurately align it to your target.
Step behind the EyeLine putting plane and aim the center black line exactly at the target. The smaller your target, the more accurate your alignment will be.
Take your stance over the ball.
Don't be surprised if your eyes try to tell you your line is off.
You may have been seeing incorrectly for years!
 Step 2 - Eyes over the ball
Look down at the ball.
Your eyes should be directly over the ball and the centerline.
This could take some adjustment in:
- -Your posture
- -The position of your hands at address
- -Your distance from the ball.
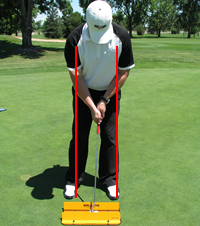 Step 3 - Shoulders square to target line
Since the putting motion is a rocking of the arms and shoulders, the shoulders need to be lined up to the target.
Look at the bottom of the EyeLine putting plane nearest your feet. You should be able to see the tops of both shoulders.
If you see only your back shoulder, you are open to the target line. If you see only your front shoulder, you are closed to the line.
Watch your shoulders as you make a stroke. Are they moving back and forth down the line?
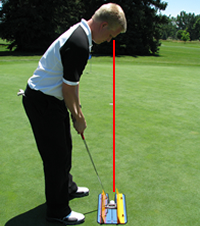
 Step 4 - Square putter face to target
Square your putter face to the target line.
Use the red line directly behind the ball as your reference. You should be able to see the red line directly in front of the putter blade.
Step 5 - Accelerating Stroke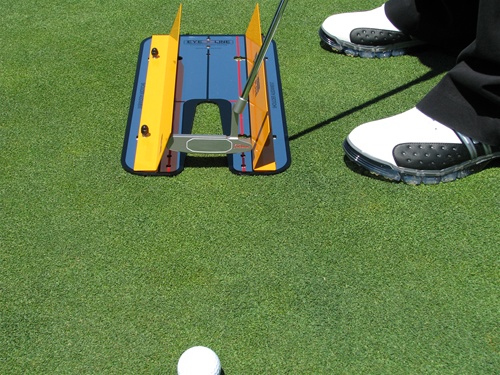
"There are two things you must do to start the ball on line: You have to keep the putter moving directly down the target line, and you must maintain a square clubface. The way to do those things is to ensure that the putter is gaining speed as it strikes the ball, rather than decelerating."
David Gossett
Golf Digest, Pg. 123, April 2002
All good putters have an accelerating stroke.
Good touch on the greens demands a stroke that is accelerating through the ball.
The EyeLine putting plane system was created to help with this good habit. There are holes behind the slot for the ball. When you place a tee in one of the holes, it provides a restriction to your back swing and forces you to accelerate through the ball.
Try this drill:
- Set up 10 feet from the hole.
- Place a tee in the EyeLine putting plane in the last hole behind the ball. Let the tee restrict your stroke and force you to accelerate. Stroke several putts trying to hit the ball farther each time. Move the tee to the next closest hole, and continue until the tee is in the closest hole to the ball.
- Get the feel of accelerating through the ball. Remove the tee and hit more putts.
- Notice how solidly you are striking the putts?
Note: This is a drill to help you learn to accelerate. As you do this drill, pay attention to the change in direction of the putter. A smooth transition combined with an accelerating stroke is Gold!
The Putting Plane Alignment System will improve your putting! Guaranteed.
|
|
|
| ||||||||
